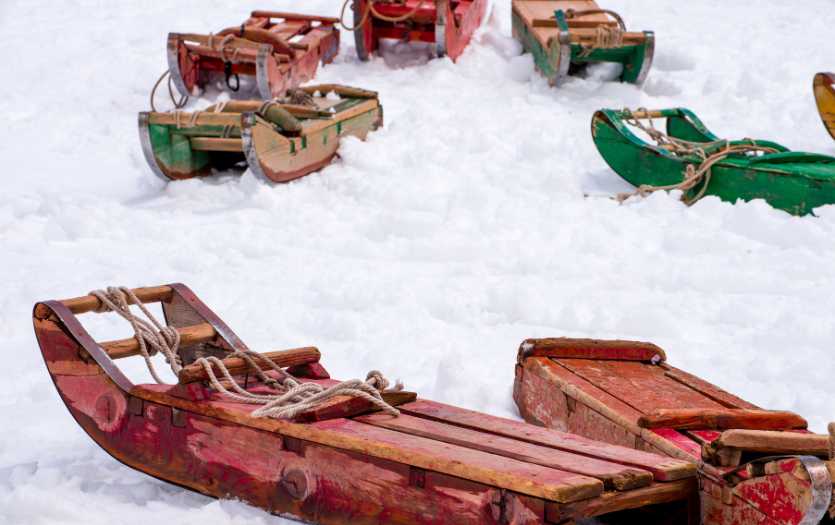
Homemade Ice Fishing Sled: The Ultimate DIY Solution for Ice Anglers
Learn how to design and construct a durable and efficient sled using simple materials and tools. Discover the benefits of a homemade sled, including cost-effectiveness and customization options. Check out our blog for instructions and tips to make your ice fishing experience successful.

Are you an ice fishing enthusiast looking for a cost-effective and customizable way to get your gear out on the ice?
Look no further than building your own homemade ice fishing sled! Not only will you save money on purchasing a pre-made sled, but you'll have the satisfaction of creating something with your own hands.
In this quick read, we'll walk you through the steps to building your own ultimate DIY ice fishing sled. Get ready to hit the ice in style with your homemade creation!
Benefits of a homemade ice fishing sled
A DIY ice fishing sled can provide various benefits for ice anglers.
- It allows you to customize your sled to fit your specific ice fishing needs. Want extra storage space? No problem - just build it into your sled design.
- Homemade ice fishing sleds are often more affordable than high-quality store-bought versions, making them a cost-effective option for those on a budget.
- There is a sense of pride and accomplishment that comes with creating something with your own hands and adding a personal touch to your fishing setup.
- A homemade sled can be made with the durable materials of your choice, ensuring that it will last for many ice fishing seasons.
Materials needed for a homemade ice fishing sled
There are a few key materials that you will need to build your own homemade ice fishing sled.
The first and most important component is a strong, durable base, which can be made from wood or plastic.
You will also need sturdy runners, allowing the sled to glide smoothly over the ice. Other materials include rope or cord for pulling the sled, foam padding for added comfort, and various tools such as measuring tape, a saw, a drill, and screws.
Depending on the specific design of your sled, you may also need additional materials such as PVC pipes or plastic sheeting. And if you are building Smitty Sleds, have a pair of ice skis (preferably downhill skis over cross-country skis) handy.
With the right materials, you can easily construct a reliable and functional homemade ice fishing sled.
If you need to get some energy and keep your gut healthy while you're outdoors, check out our article on the Best Prebiotic Sodas.
Steps for building a homemade ice fishing sled
Here are the steps for building a homemade ice fishing sled:
Step 1: Gather the necessary materials. You'll need a lightweight material such as aluminum, plastic, or even wood to build your sled. You’ll also need rope, nails, screws, and glue to assemble everything.
Step 2: Cut out the basic shape of the sled. Measure out the dimensions of your sled, then mark and cut out the frame from your lightweight material. Make sure to leave some excess material around the edges for added durability.
Step 3: Attach the sides and bottom of your sled together with nails and/or screws to form an enclosed base. Be sure not to leave any gaps between panels as this can lead to leaks and rotting down the road.
Step 4: Secure additional reinforcing pieces at strategic points along all four sides of your ice fishing sled with either nails or screws to strengthen it further. Add strips of wood or metal along each side for extra strength if desired.
Step 5: Drill holes into each corner of your ice fishing sled so that you can attach a rope or bungee cord that will serve as a handle when you pull it across snow and ice on trips.
Step 6: Apply a waterproof sealant over all surfaces of the ice fishing sled if desired to protect it from moisture and help maintain its structural integrity over long periods of time spent outdoors during hard winters.
Step 7: Test your homemade ice fishing sled by taking it out onto thick patches of ice or snow! Ensure it is properly balanced before using it – otherwise, you may risk tipping over while spinning away in circles! Enjoy your new ice-fishing adventure!
Check out the video to build a sled on a tight budget:
Additional Customization of the Sled to meet your specific needs
If you plan on using heavier tackle boxes and other items, consider increasing the width of the frame to provide extra stability. Depending on the gear and sled's weight, size, and weight of your haul, you may want to add additional reinforcing pieces or adjust the frame size for greater stability.
Additionally, adding dividers within the sled can help keep your ice fishing equipment organized for easy access when needed. If you want to make your sled more visible during those low-light days out on the lake, consider adding reflective tape or paint along key points of it.
Most importantly, if you have or already bought an ice fishing sled, you can customize it for better movement on the ice by building an additional structure. Attach skis parallel to each other to the bottom. This will provide extra stability and make it much easier to maneuver around on ice!
Check out the video below to build the structure for Smitty sled modification:
How to make an ice fishing sled easier to pull?
If you're an ice fisherman, you know that one of the most frustrating parts of the sport can be lugging all of your gear out onto the ice. A sled can make the process much easier, but sometimes even those can be tough to pull, especially if the ice is rough or you're dealing with a particularly heavy load.
Here are a few tips to make your ice fishing sled easier to pull:
- Make sure your sled is the right size for your needs. A larger sled may seem like a good idea, but it will also be harder to pull, especially if it's not filled to capacity.
- Check the shape of your sled and consider investing in a sleeker design that allows wind to move around it more easily. The less resistant your sled is to the air, the easier it will be to pull across ice surfaces.
- Use a good-quality tow rope. A sturdy, high-quality rope will be less likely to break or stretch under the weight of your sled.
- Add straps or hooks for easy transporting over long distances and attach with vehicles such as ATVs or snowmobiles when possible.
- Keep your gear organized. The more evenly distributed your gear is in the sled, the easier it will be to pull. Consider using dividers or organizers to keep everything in place.
- Use a longer rope or tow strap as the longer the rope, the more leverage you'll have when pulling the sled. This will make it easier on your arms and back, especially if you're pulling over uneven or slippery terrain.
- Another useful tip is to add skis to your sled. Attaching two skis at either end will allow you to glide effortlessly across uneven terrain rather than struggle with lifting and pushing every few meters!
- When adding skis remember that longer and wider skis have more gliding power so opt for those if possible! So it is better to choose downhill skis. Make sure that the ski tips are aligned perfectly and you can also attach ropes to ski tips, making it easier to pull.
Also, check out our guide on Devils Lake Ice Fishing where you can test out the sled you have built!
Maintaining your homemade ice fishing sled
Here are some tips for using and maintaining your DIY ice fishing sled:
- Before heading out on the ice, check the thickness and safety of the ice. A general rule of thumb is that ice should be at least 4 inches thick for walking, 5 inches for snowmobiles and ATVs, and 8-12 inches for cars and trucks.
- Make sure the sled is properly balanced before heading out onto the ice. An unbalanced sled can tip over easily, potentially causing harm to you and damaging your gear.
- When pulling your ice fishing sled, use a long tow rope or tow strap to distribute the load evenly and reduce strain on the sled.
- To ensure that your sled glides smoothly over the ice, keep the bottom clean and free of ice build-up, especially if you have to tow over an area of deep snow.
- To prevent your gear from getting wet, properly seal the sled and cover any openings with waterproof material. You can also use a tarp or canvas to cover the top of the sled and protect your gear from the elements.
- After each use, thoroughly dry off your sled and store it in a dry place. This will prevent rust and prolong the life of your homemade ice fishing sled.
- If you notice any cracks or damage to your sled, repair them immediately to prevent further damage. You can use a fiberglass repair kit or a similar product to patch any holes or cracks.
Following these tips, you can enjoy your homemade ice fishing sled for many seasons.
Final Thoughts
In conclusion, homemade ice fishing sleds can be a fun way to transport your gear out on the ice. However, it's important to ensure that your sled is sturdy and well-built for a safe and successful fishing trip.
And if you're still on the fence, check out our article on the best ice fishing sleds for even more options to help you land the catch of a lifetime. We have compiled a list of the most reliable and value-for-money picks to enjoy your ice-fishing adventures without all the hassles of building a sled.
Tap the button below and check out our top picks.
